Introduction
Having a dynamic website that responds quickly to user requests and provides updated information 24/7 is a must. Nowadays, many organizations are aware that a web site is not a onetime shot; a web site needs maintenance.
A web site that is frequently updated will attract more audience; provide always the latest news and the latest offers if promoting goods.
Most well structured web sites are supported by a database backend. Such backend provides a way to easily store, manage and retrieve data. In simple terms, if all data is stored in a database maintenance is easier.
Nowadays, databases enable you to store different sorts of data and amongst others in conjunction with a web site a database can be used to:
- Store user accounts
- Store products
- Record all transactions
- Keep track of visitors and actions
- Store images and files
To implement a database backend, you need to have a clear view of the requirements. Reason being that pushing data in one location may cause a size concern; store only what is required.
More than a file, a database backend is an environment and to implement such environment you need to install a Database Management System (DBMS). A DBMS provides the require tools to create, manage, maintain and secure your databases. The most commonly used are:
In this blog I will use MySQL that is including in the XAMPP package, and will describe how to create a log-in page using a database table with PHP scripting.
Task Description
This blog describes my experience while performing a task assigned by my tutor. The task consists of the following stages:
- Log into the SQL server using command line and perform some commands such as listing the databases.
- Attempt to connect to SQL by using PHPMYADMIN.
- Create a database that stores usernames and passwords.
- Modify your PHP program from the previous lab session to connect to the database to authenticate the user.
MySQL command line
Open command line
In XAMPP the MySQL tools are located in <XAMPP installation folder>\mysql\bin. To access MySQL from a command line:
1. Open a command line interface.
2. Open the MySQL folder C:\XAMPP\mysql\bin and open MySQL using the following command line code mysql -u root -p
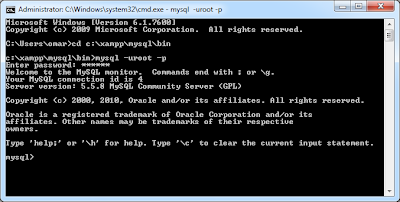
3. The command line will prompt for the MySQL root password.
Command line examples
The following syntax will list all databases:
SHOW DATABASES;

The following syntax creates a new database named blog_database:
CREATE DATABASE blog_database;
The show databases syntax can be used to ensure that the new database has been added,

The following syntax adds a new user ‘omar’ having a password ‘12345’:
CREATE USER 'omar'@'localhost' IDENTIFIED BY '12345'
In MySQL, users are stored in mysql.user table. To list all users the following syntax is used:
SELECT host,user FROM mysql.user;

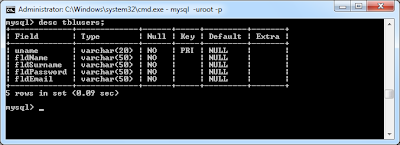
The following syntax is used to add a new table tblUsers to the Blog_Database.
CREATE TABLE `Blog_Database`.`tblUsers` (
`uname` VARCHAR( 20 ) NOT NULL ,
`fldName` VARCHAR( 50 ) NOT NULL ,
`fldSurname` VARCHAR( 50 ) NOT NULL ,
`fldPassword` VARCHAR( 50 ) NOT NULL ,
`fldEmail` VARCHAR( 50 ) NOT NULL ,
PRIMARY KEY ( `uname` )
) ENGINE = InnoDB;

To display information on a specific table, the following syntax is used:
desc <table name>;
To display the list of tables in a database, the following syntax is used:
show tables;

Using phpMyAdmin
This free software is written in PHP and enables you to manage instances of MySQL over the web. For more information, refer to phpMyAdmin Home page. phpMyAdmin is also included with the XAMPP package. To launch phpMyAdmin from a XAMPP installation, launch the following page from an internet browser: http://localhost/phpmyadmin/ and key in your MySQL user name and password.

Manage your MySQL Databases
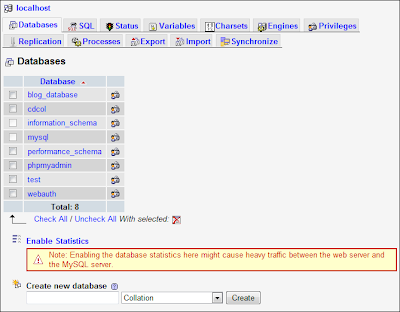
Create and run sql statements
Manage tables

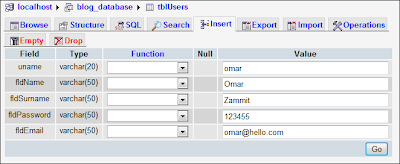
Insert data into a table
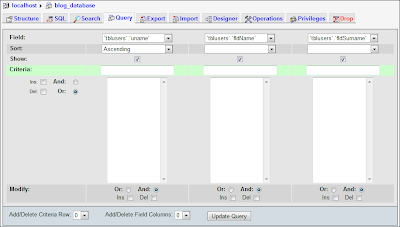
Easy to use query builder
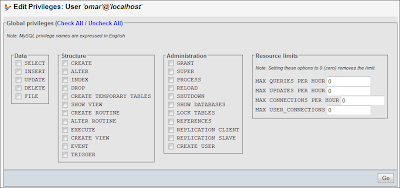
Manage users and privileges
Alternatives
In my opinion, phpMyAdmin is a powerful tool to have but personally to manage MySQL instances I prefer using SQL yog or MySQL Workbench; interface is more intuitive and very easy to use.
Create a database
To create a database backend for my login page, I performed the following steps.
Step 1: Create a new database ‘blog_database’ using the following syntax:
CREATE DATABASE blog_database;
Step 2: Create a new table ‘tblUsers’ using the following SQL syntax:
CREATE TABLE `Blog_Database`.`tblUsers` (
`uname` VARCHAR( 20 ) NOT NULL ,
`fldName` VARCHAR( 50 ) NOT NULL ,
`fldSurname` VARCHAR( 50 ) NOT NULL ,
`fldPassword` VARCHAR( 50 ) NOT NULL ,
`fldEmail` VARCHAR( 50 ) NOT NULL ,
PRIMARY KEY ( `uname` )
) ENGINE = InnoDB;
Step 3: Add some data (three users) using the following SQL syntax:
INSERT INTO `tblUsers`
(`uname`, `fldName`, `fldSurname`, `fldPassword`, `fldEmail`)
VALUES
('christ', 'Christine', 'Bezzina', '53241', 'christb@inbox.com');
INSERT INTO `tblUsers`
(`uname`, `fldName`, `fldSurname`, `fldPassword`, `fldEmail`)
VALUES
('eliza', 'Eliza', 'Grech', '101010', 'eligre@inbox.com');
INSERT INTO `tblUsers`
(`uname`, `fldName`, `fldSurname`, `fldPassword`, `fldEmail`)
VALUES
('omar', 'Omar', 'Zammit', '12345', 'omarz@inbox.net');
Step 4: Create a user with only SELECT privilege over tblUser table.
CREATE USER 'webuser'@'localhost' IDENTIFIED BY '12345';
REVOKE ALL PRIVILEGES ON *.* FROM webuser@localhost;
GRANT SELECT ON blog_database.tblUsers TO webuser@localhost;
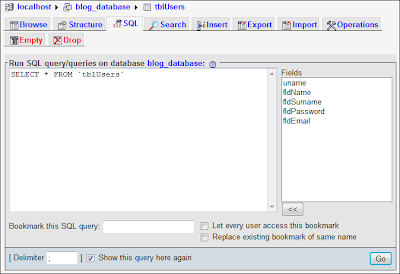
Step 5: View all table data from a command line
SELECT * FROM blog_database.tblUsers;

Log-in pages
The log-in page enables the user to enter valid credentials to log-in to the system. Once the credentials are entered the log-in page will search the values from a database table using a select statement similar to the following:
SELECT * FROM `tblusers` WHERE uname='$User' and fldPassword='$Password'
Where $User and $Password are the user name and password parameters.
If the values are found, the database table row is stored in a variable and the fields’ data is displayed in a new page (welcome.php).
The index.php page

When this page is submitted, the values supplied by the user are validated using the validateUser(<User name>,<Password>) function; Line 10.
The values returned by the validateUser() function are stored in a session variable in line 19. Once stored, the welcome.php page is called.
If validateUser() returns a null value, the error at line 25 is displayed in the index.php page.

In line 33, the validateUser() function, creates an SQL connection using a MySQL user account.
In line 37 is using the mysql_select_db, to instruct the MySQL instance to use and run the queries on the blog_database.
In line 40, the SELECT statement will search for the user name and password submitted by the user. If credentials submitted are valid, the statement will return a database table row; this is stored in $rows.
In line 44, the first row is split into a new array ($row) and in line 50 this array is returned as a function result.
The welcome.php page

In line 13, the welcome.php page checks if a session containing the user details, exists. If the session is found, the details are stored in a variable $username (line 18). Lines 21 to 24 display the user information.
Using the log-in page
Launching index.php

Submitting invalid credentials – the error message

Submitting valid credentials – the welcome page

A bit of security
It is highly recommended that passwords are not stored into a database in plain text; if the database password is compromised, all passwords are accessible. The best way to protect your password is by using encryption and hashing algorithms. Such cryptographic methods will encrypt the password in an unreadable format and store the encrypted value. During validation, the user input is encrypted and compared with the stored value.
Crypt
PHP has its own cryptographic function and can be called using the following syntax:
$Variable= crypt (<Value>, <Salt>);
Where Value is the string text to encrypt and Salt the characters that will be used to encrypt the Value.
The crypt function supports four types of encryption algorithms:
Algorithm | Salt - Number of characters |
CRYPT_STD_DES | 2 |
CRYPT_EXT_DES | 9 |
CRYPT_MD5 | 12 |
CRYPT_BLOWFISH | 16 |
MD5
MD5 is one of the most commonly used one way hashing algorithm. This method transforms a message into a fixed-length outcome. Making the contents difficult to translate and decipher. To transform a value using MD5, the following PHP syntax is used:
$variable = md5(<Value>);
Other methods
Other more secure methods exist, and amongst others, one can find:
- Mcrypt – an encryption library with 22 different algorithms. For more information, refer to the Mcrypt manual.
- Mhash – an encryption library with 12 different algorithms. For more information, refer to the Mhash manual.
Conclusion
The phpMyAdmin included with the XAMPP package enabled me to perform some database tasks. The tool is powerful and easy to use but personally I prefer SQL yog or MySQL Workbench.
While performing the steps in this task, I was really impressed how easy it is to interface with a database from a PHP script; compared to other scripts it’s pretty straight forward.
Various encryption methods exist to protect plain text passwords, I prefer MD5 because it’s easy to implement and secure.
Resources
Download the database log-in sample files.
Online Casino in Karnataka - Kardangpintar
ReplyDeleteThere are only two online casino 제왕 카지노 in Karnataka right now: Net Casino, NetBet, BVino and NetBet. With over งานออนไลน์ 8000 machines available, you can enjoy playing in kadangpintar